This post was first published on my general blog hefnawi.me and is the first amateur radio specific writing.
Prologue
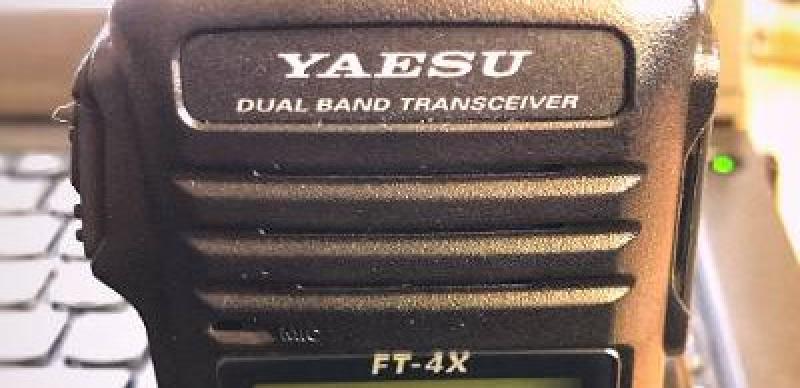
Yaesu FT-4X is a very interesting handheld radio that is not very expensive (~ £65) and I believe is a good starting point compared to my previous Baofeng UV-5R Plus radio. I suggest you read the article by QRPblog in the references below for an in-depth review of FT-4X (also some comparison against Baofeng UV-5Rs).
This post will explain how to progam a list of repeaters using CHIRP software into a Yaesu FT-4XE handheld radio, which is the European version of FT-4X, however, the procedure should be identical for FT-4XR (USA/Asian version) AFAIK.
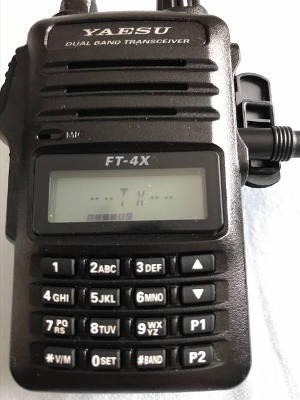
The FT-4X is a 5W VHF/UHF FM Portable Transceiver. In addition, it has 3 power settings “High” is 5W, “Mid” is 2.5W and “Low” is 0.5W.
I highly recommend you read the official manuals from Yaesu on FT-4X (both the operational manual and the advanced manual), linked in the resources at the end of this post, you will be surprised by the helpful tips included!
Things you will need
-
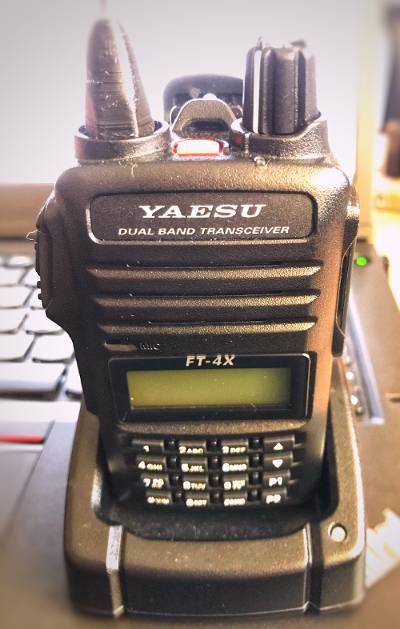
Yaesu FT-4X(E/R) Handheld Radio
-
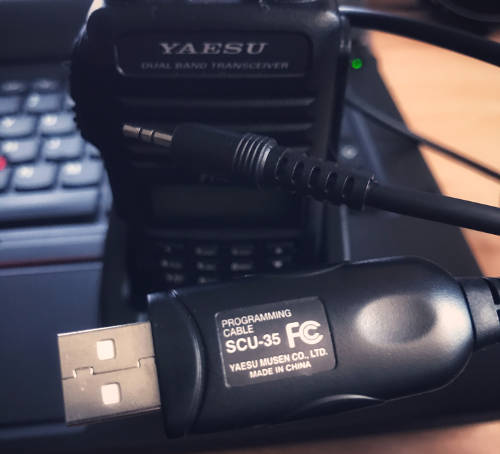
Yaesu SCU-35 Programming Cable
-
CHIRP Software
-
Linux Computer/Laptop
Yaesu SCU-35 Programming Cable
1. Download and Install CHIRP
You can go to the CHIRP website download page, which has guidance for Windows, MacOS and Linux users.
I’m using Ubuntu, so this guide will only cover the Linux version. But the following steps should be fairly identical for all versions across MacOS and Windows installations.
Note regarding serial port permissions on Linux from CHIRP website (I didn’t have to perform this step, but it might be of help?),
Note that you may need to adjust permissions on the
/dev/tty(something)device, or add your users who want to use Chirp to the “dialout” group in order to let non-privileged users access the serial device.This issue is often indicated by an “access denied” error when accessing serial port.
On most Linux distros this is accomplished with:
sudo addgroup "$USERNAME" dialoutYou will then need to log out and back in for it to take effect.
Now, let’s install CHIRP on Ubuntu from the PPA (Personal Package Archive)
sudo apt-add-repository ppa:dansmith/chirp-snapshots
sudo apt-get update
sudo apt-get install chirp-daily
I recommend going the PPA way, because I couldn’t find the “FT-4X” model under the version downloaded from Ubuntu’s APT repository.
Once you install chirp-daily from the PPA, you should be able to find the chirpw tool in your system.
chirpw- A tool for programming two-way radio equipment
On my system it looks like so,
$ which chirpw
/usr/bin/chirpw
2. Plug FT-4X Radio via USB
-
Turn-off your Yaesu FT-4X handheld radio, by turning the volume/power knob all the way counter-clockwise, you will hear a click.
-
Connect the SCU-35 programming cable to your the radio’s “MIC” input as shown below,

FT-4X Programming Cable -
Connect the USB end of the SCU-35 cable into your computer
-
Identify the USB port, in order to use it with CHIRP
Use
dmesgto identify the port,$ dmesg | tail [___.___] usb 3-3: Product: USB-Serial Controller [___.___] usb 3-3: Manufacturer: Prolific Technology Inc. [___.___] usbcore: registered new interface driver usbserial_generic [___.___] usbserial: USB Serial support registered for generic [___.___] usbcore: registered new interface driver pl2303 [___.___] usbserial: USB Serial support registered for pl2303 [___.___] pl2303 3-3:1.0: pl2303 converter detected [___.___] usb 3-3: pl2303 converter now attached to ttyUSB0As you can see form the last line of the output above, it is connected as
/dev/ttyUSB0, yours might be different.
3. Connect FT-4X Radio to CHIRP
-
Launch CHIRP software, I opened it from the terminal as
chirpwcommand. -
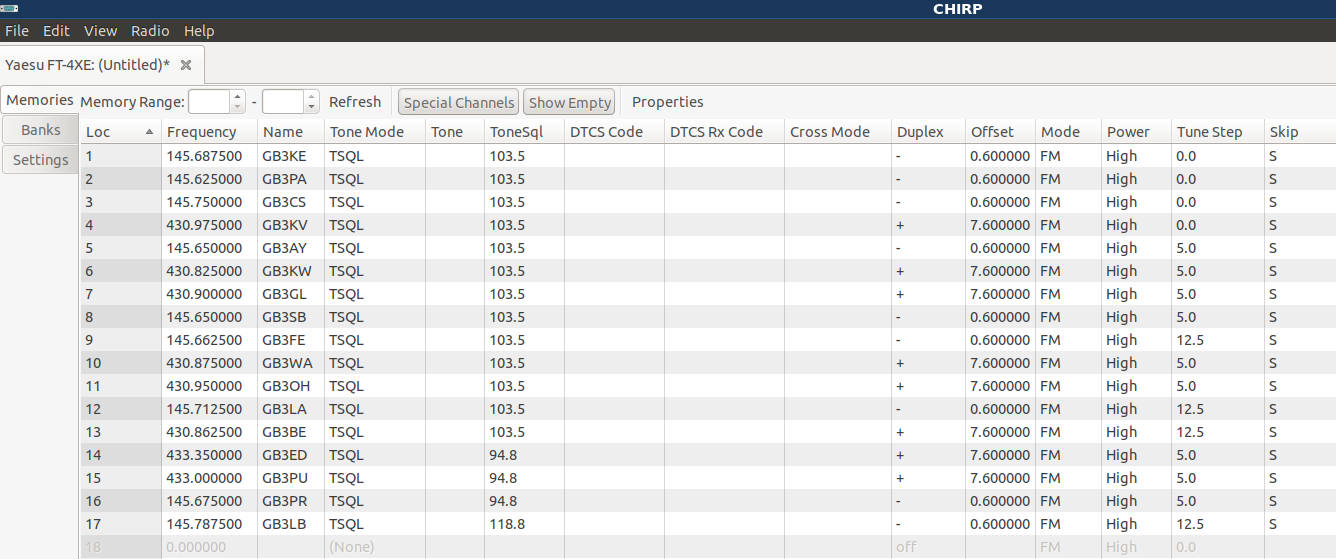
From main menu, select “Radio” -> “Download From Radio”, which should pop-up a window as shown below,
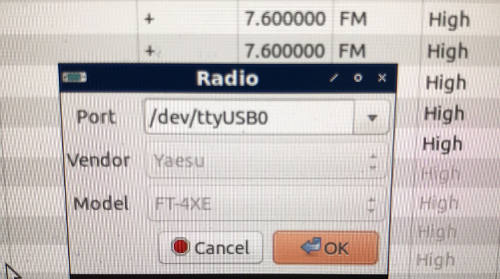
CHIRP Radio Window -
Select the correct “Port” as the output from step 2 above.
-
Select “Yaesu” as the “Vendor”.
-
Select “FT-4XE” as the “Model”, use “FT-4XR” if you are using the FT-4XR (US version) of the radio.
-
Hit “OK”.
-
CHIRP will ask you if you want to proceed with experimental driver at your own risk, I accepted the risk since I don’t know of any cases where the driver damaged the radio, but this is your call, I’m not liable for any damage caused by the CHIRP software, this is your decision.
-
If you accept the risk, then another dialogue window will open with “Yaesu FT-4XE Instructions”, read it (it’s only 8 words =p ).
-
Now it’s time to open your FT-4X radio, by turning the volume/power knob in the clockwise direction (I assume you are following the steps above, and your programming cable is already plugged into your MIC jack).
-
I suggest you tune to an unused frequency either on VHF or UHF so that the radio is quite just for convenience during the programming process.
-
Hit “OK” on the “Yaesu FT-4XE Instructions” dialogue.
-
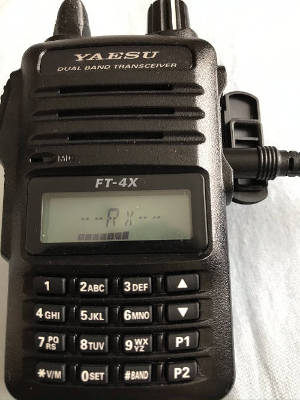
CHIRP should start cloning your FT-4X radio and you should see “–TX–” displayed on your radio (basically your radio is transmitting data to CHIRP via programming cable, hence the “TX”).
CHIRP Download From Radio -
Once CHIRP finishes downloading data from the radio, you shall see the word “CLONE” displayed on the FT-4X radio.

Yaesu FT-4X Radio Clone -
Also, CHIRP will display all of the available channels (if any exist) in the UI, if this is your first time programming your radio it should be empty.
4. Get Repeater Details
IMO, the best resource for getting a list of local repeaters is through your local amateur radio club.
Another way is using an online resource,
Let’s have a look on any operational 2m repeater from ukrepeater.net website in order to explain how to import one into CHIRP software.
I will choose “GB3KE”, which is located in Glasgow, Scotland.
If you check the GB3KE link above, you will learn the following:
- Band: 2m
- Output Frequency (of repeater): 145.6875 MHz
- RX Frequency (of repeater): 145.0875 MHz
- CTCSS Tone: 103.5 Hz
- Licenced for ANALOGUE VOICE repeat mode, i.e. FM mode
Note: Output frequency of the repeater is often called the listening frequency, since this is the frequency which the repeater will transmit on, hence you would be receiving on that frequency to listen to the repeater.
Note: CTCSS is Continuous Tone-Coded Squelch System.
Frequency Offset (Shift)
The repeater offset is the difference in frequency between the output frequency and the RX frequency of the repeater, this is either a +ve shift or -ve shift.
Usually, for 2m FM repeaters (VHF) the shift is negative (-ve) with a value of 0.6 MHz.
Therefore, (RX Frequency) = (Output Frequency) - (0.6).
On the other hand, for 70cm FM repeaters (UHF) the shift is positive (+ve) with a value of 7.6 MHz.
Therefore, (RX Frequency) = (Output Frequency) + (7.6)
These are the main data that we need for each of the repeaters before importing into CHIRP.
5. Import/Add Channels in CHIRP
Following the example above of GB3KE 2m FM repeater, we will add each of the fields in CHIRP manually.
- Loc: 1 (CHIRP will increment the ID automatically)
- Frequency: 145.6875 (insert the output (downlink) frequency of the repeater in MHz)
- Name: GB3KE (any name relevant to the channel or repeater ID)
- Tone Mode: “Tone” or “TSQL” (I personally use “TSQL”)
- Tone: only use if you choose “Tone” in the previous field (Tone Mode)
- ToneSql: 103.5 (insert the CTCSS in Hertz)
- Duplex: “-” (this is the frequency shift direction, +/- as discussed in the frequency offset above)
- Offset: 0.6 (insert frequency offset in MHz)
- Mode: “FM” (this should be FM for Analogue Voice repeaters)
- Power: “High” (High is 5W, other options: “Mid” is 2.5W and “Low” is 0.5W)
- Skip: “S” or None (this should set the behaviour to either skip this channel while scanning or not, might need to test as it’s not always applied)
Now, we can repeat the above in order to insert the rest of the repeaters in CHIRP.
Feel free to shout out if you have a specific problem with any of these steps, I would be happy to provide assistance.
6. Upload Data to FT-4X
Once you are done with the import of all your local repeaters and any channels you want to program into your FT-4X radio, you can now upload all channels and settings to the radio.
From main menu choose “Radio” -> “Upload To Radio”, CHIRP should start showing a progress bar same as the process of downloading.
Meanwhile, the FT-4X handheld radio display will show the progress and also display “–RX–”, since the radio is receiving data from CHIRP.
When CHIRP is done and the “–RX–” is no longer displayed on your handheld radio, you can now safely turn off the radio (rotate volume/power knob counter-clockwise till it clicks) and remove the programming cable from the computer, and from your radio.
7. Check Memory Channels on FT-4X
Now, the final step is turn on the radio and push the “* V/M” button on the bottom left of the keypad, this will switch between the VFO modes and the memory mode, you might need to push it a couple of times untill it displays “MEMORY” and enters memory mode.
Once you are in the memory mode, you should be able to see all of the uploaded repeaters and you can switch between them using the up/down arrow keys and you can also use the scan functionality to scan your repeaters list.
8. Unlocking Yaesu FT-4XE / FT-4XR Wideband Transmit
If you find yourself locked out of transmitting on a frequency that you are authorised to use as a radio amateur, then you might consider unlocking your Yaesu FT-4X handheld radio.
All credit goes to QRPblog’s article in the references below, this is how I learned to unlock my handheld radio.
I came across this situation when testing the 70cm repeater GB3ED. The RX frequency of that repeater is 434.9500 MHz.

However, when I tried to transmit/connect to that repeater, the radio displayed “ERROR”. This is when you need to unlock your radio.

The steps should be the same for FT-4XE and FT-4XR, however, I only personally tested the FT-4XE version, so please let me know in the comments if this works for you.
-
Start with your handheld radio turned off.
-
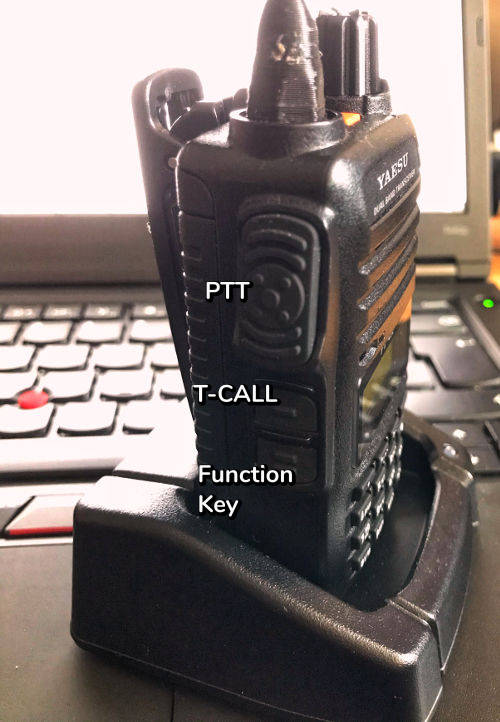
Turn on the radio while holding down the “PTT” button AND the “MONI/T-CALL” button.
-
Once the radio is turned on, release the buttons.
-
The display should have something like “F1 SET.RST” on it, that’s when you start to enter the unlock code indicated in the next step.

Yaesu FT-4XE FT4XR SET.RST -
Enter this sequence of numbers using the keypad (there will be no feedback on the display):
3 2 4 0 6 6 6 5 -
The handheld radio should reboot now.
In order to reverse this procedure, you just perform it all over again.
Respect your Licence Conditions
Finally, I just wanted to stress out that you must at all times respect your licence conditions and not transmit outside your allocated frequency bands.
73s de MMØTTZ
Former MM7DRA and 2MØILU =)
Hope to catch you on the air some day 😄